
Email templates and notifications
Customising email templates, previewing, test-sending and restoring the default, sending a notification to your team and its channels, quiet hours, and the monthly email limit.
This article covers two pages: Email Templates, which set how the emails your store sends look, and Notifications, which you send to your team members.
Email templates
Every template has a platform default in Arabic and English. When you edit a template and save it, a customized version is created for your store, and its card shows a Customized badge.
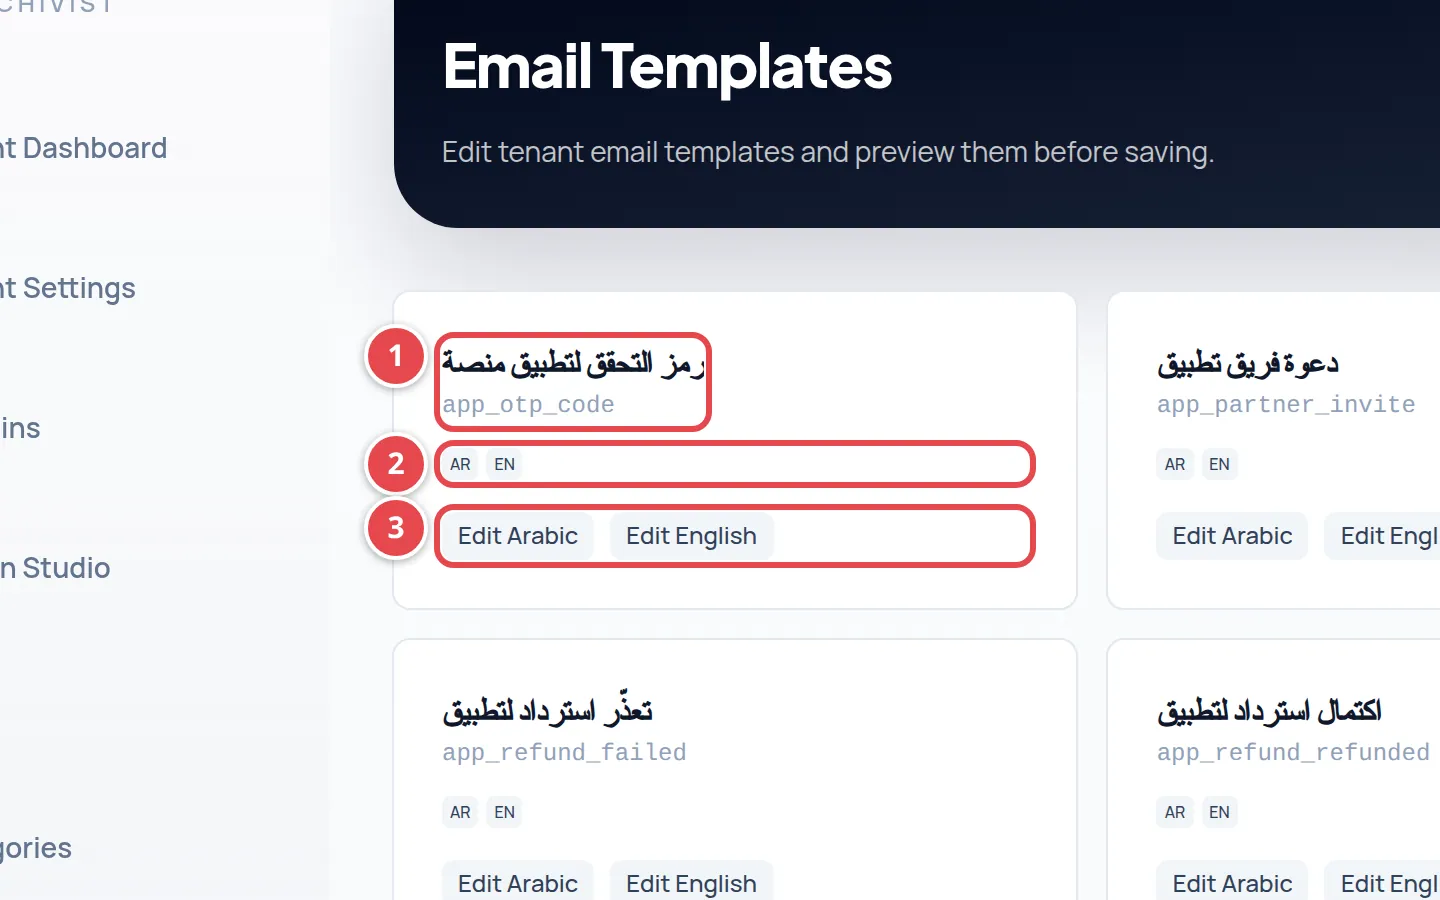
- The template name and description.
- The available languages, and the Customized badge if you edited it.
- The Edit Arabic and Edit English buttons.
Editing a template
Open the editor
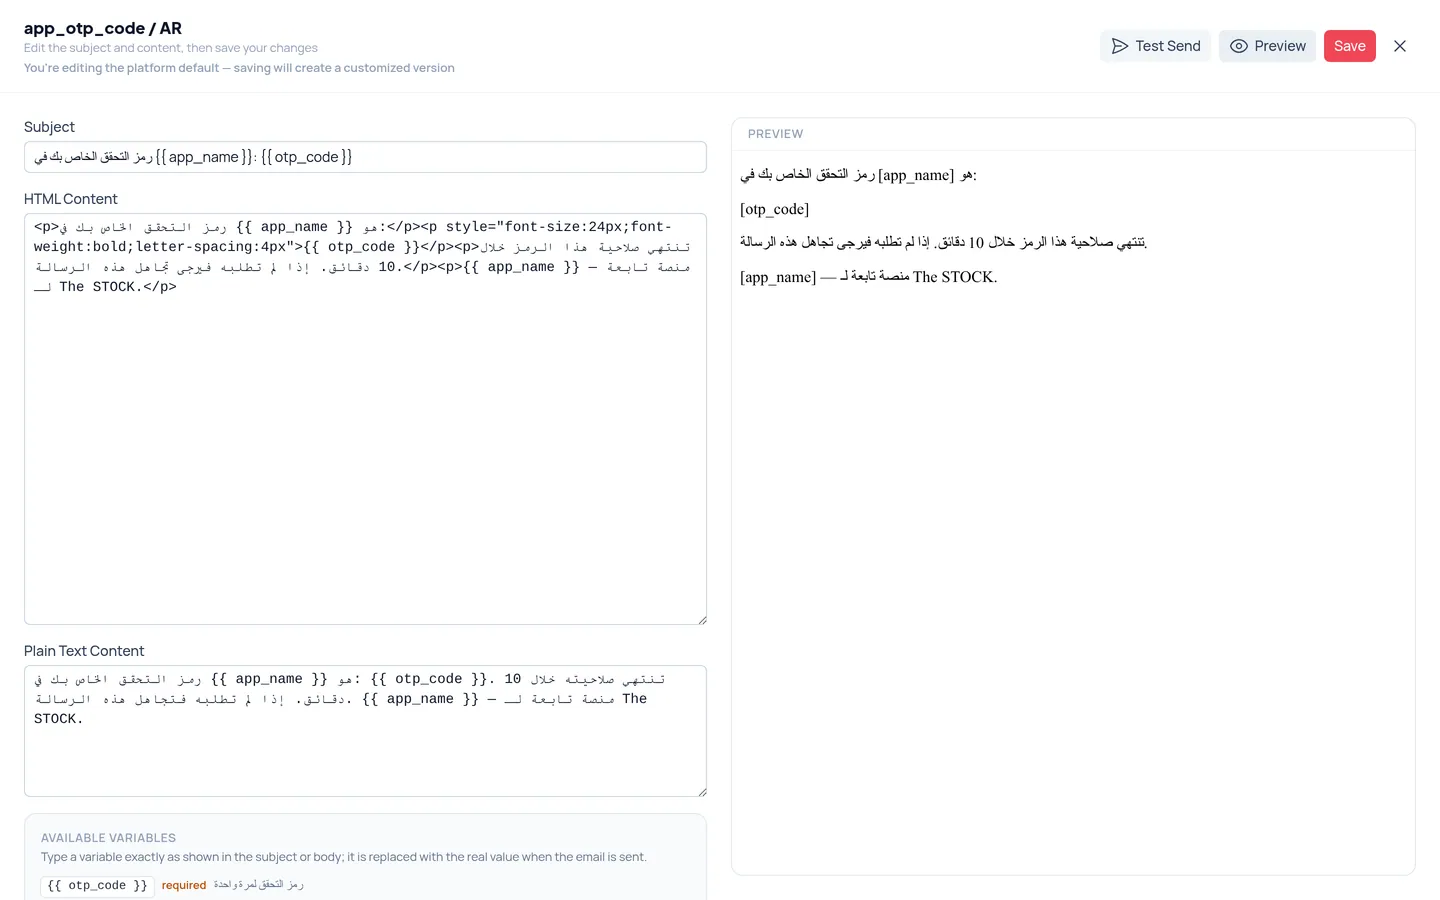
Press Edit Arabic or Edit English on the template card. At the top you see whether you are editing the platform default or your tenant's customized version.
Edit the content
Change the Subject and the HTML Content, and the Plain Text Content if you like. Keep the variables in double braces as they are, such as {{user_name}}, because the system replaces them with real values.
Preview
Press Preview to see the email beside the editor. Variables show sample values in brackets, such as [user_name].
Send a test
Press Test Send, enter your email in Recipient, then Send.
Save
Press Save. You see Template saved and your store starts using your version.
Restoring the default
A customized version shows a Restore default button. After you confirm, your version is deleted and the template goes back to the platform's. The deletion cannot be undone, so copy your content first if you want to keep it.
Notifications
On the Notifications page you send a message to a member of your store team, and see the notifications you received.
Create the notification
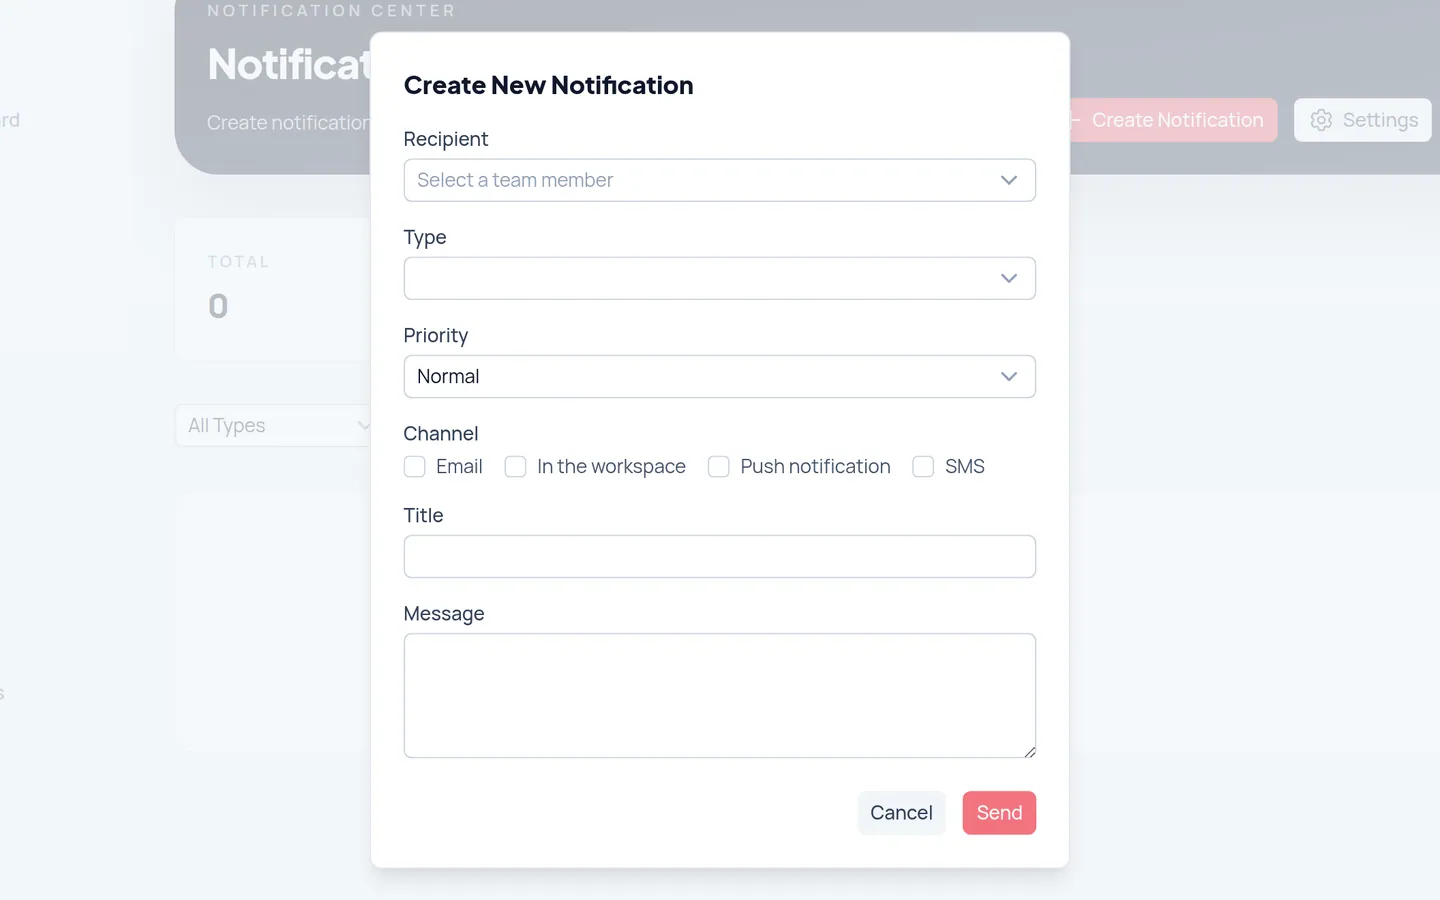
Press Create Notification.
Choose the recipient
Choose a team member under Recipient.
Set type, priority and channel
Choose the Type and Priority. Under Channel pick how it is delivered, such as email. If you pick no channel, it is delivered on the channels the recipient has switched on.
Write and send
Enter the Title and Message, then Send.
On the page you can filter by Notification Type or by Unread and Read, select several notifications and press Mark ... as read.
Settings and quiet hours
The Settings button opens your own preferences as a recipient, not settings for the whole store. Each member sets their own:
| Setting | What it does |
|---|---|
| Channels | Turns Email, SMS and Push on or off for what you receive. |
| Review emails | A digest of client comments and decisions on your review spaces, at most one email every 10 minutes. If you turn it off you do not get this digest, by email or in the dashboard. Quiet hours do not hold it back. See Share files with clients. |
| Quiet hours | Between the two times you only get the in-dashboard notification, unless the priority is critical. The default is 22:00 to 08:00 Riyadh time. |
Preview or the test send does not work?
Check that the Subject and HTML Content are not empty and that the variables are written correctly. Test sends are limited to a few per minute, so wait a moment and try again.
Who can send notifications?
The owner, admins and editors. Viewers read their own notifications only. See Team and roles.